Home / Tips & Tricks / 10 key points covered in our CFD Meshing Tips & Tricks webinar

10 key points covered in our CFD Meshing Tips & Tricks webinar

A quick thanks to the large number of customers in Australia and New Zealand who attended our July webinar on ANSYS CFD Meshing Tips & Tricks.  We've had many enquiries from people wanting to know more, so we thought we'd break the content down into the 10 key points below.  If you want more information on any specific point, then please contact us directly or post a comment in the field at the bottom of the page.


 10 key points to a successful CFD Meshing strategy (taken from the demonstration throughout LEAP's webinar on CFD Meshing Tips & Tricks):

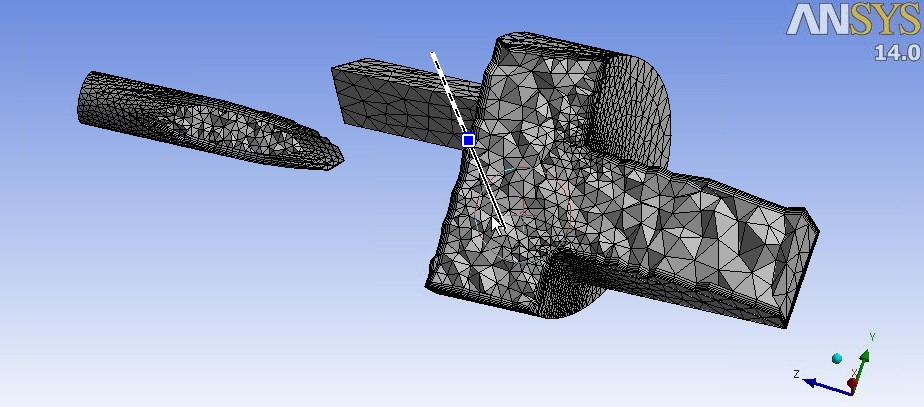
  1. Firstly, decide what mesh connectivity your problem requires (conformal / non-conformal) and how this will affect the setup of your geometry - single part, multi-body parts or separate bodies. 
  2. Utilise the tools available for geometry clean-up - using DesignModeler or SpaceClaim Direct Modeler - to quickly address any small surfaces, split edges, hard edges that are present in your CAD.
  3. Decide whether you can use a patch-conforming meshing approach (preferred for most CFD cases), or need to use a patch-independent approach to tackle dirty CAD geometry.
  4. Make use of the preview tools for previewing the surface mesh and inflation layers.  This can be a great time saver for large, complex models!
  5. Use the show tool to indicate if there are bodies that are automatically sweepable, and/or faces that can be easily map meshed.
  6. Make sure you are using the correct meshing preference - talk to us if you need more information on different meshing requirements for Mechanical, CFD, Explicit Dynamics problems.
  7. Understand when it is helpful to use Assembly meshing.  If Assembly meshing is part of your strategy, remember that Fluent should be selected as Solver type which gives you access to the Cut-cell and Cut-tet methods.  CFX users can use this same approach to generate Cut-tet meshes.
  8. If you are hex meshing, it is useful to understand how to use Sweep meshing controls most efficiently. The ability to display nodes and edge parametric directions are very handy!
  9. Don't forget you have the ability to use Virtual Topology and Pinch commands to cleanup geometry in ANSYS Meshing.
  10. If you are dealing with large assemblies and/or non-conformal meshes, the automatic contact detection is a tool you cannot live without. Use it to check connectivity of bodies with the new Body View tool. Don't forget the importance of 'group by none' for CFX users.

 If you weren't able to attend the webinar, or did but simply want more information on what was covered, please let us know below or contact LEAP's technical support hotline.  For more information on upcoming events, please visit LEAP's webinar, training and events page.

11 comments

    • This feature is a setting used in ANSYS Meshing when importing geometry. If we set the global contact detection setting to "group by none", we can force it to generate only single-region to single-region connections. This way we will only get interfaces in CFX-Pre or FLUENT that give no overlap regions, meaning that each interface defines exactly the transfer of data between the two domains.

  • Hi blogger,

    I was using blocking technique to generate HEXA mesh using Ansys HExa mEsher 11.0. I wanted to learn Ansys 14.0 tetra mesher so I imported same geometry but was not able to generate same kind of mesh according to my choice.

    I wanted to know what is virtual topology and pinch control, how it is used and when it is used. Can you please guide me in detail or provide some tutorial.

    My geometry is very simple. It consists of solid cylinder and concentric cylinder which is tappered. The inner solid cylinder is of air and outer tapperd cylinder is of water.

    I want to know the whole procedure to mesh it. If there is a strategy to initially model in geometry modeller or mesher is sufficient to generate meshing. I have tried sweep and multizone mesh but I want to have inflation at the outer boundry of inner cylinder and both boundaries of outer cylinder, which I am not able to generate. Please guide me. If the problem is not clear I can even send you image file or geom file. Please tell me the procedure to do the thing.

    • Apologies but we cannot provide training via this medium. We suggest that you talk to your local ANSYS office or Channel Partner.

  • Hello Sir,

    i would like to take part in CFD simulatiom analysis. as i have started to read abt required mesh generating for CFD model. its seem before to start meshing, must understand y meshing to be done, here i need clear knowledge of conformal mesh, path, independence conformal mesh, and what is Y+

    Please help me to provide needed document to understand above question

    • Hi Damodaran, thanks for your message. We suggest you review other posts on this blog covering these topics under the "Tips and Tricks" category, such as:
      - Estimating the First Cell Height for correct Y+
      - Turbulence Part 3 – Selection of wall functions and Y+ to best capture the Turbulent Boundary Layer
      - Turbulence Part 2 – Wall Functions and Y+ requirements
      - Convergence and Mesh Independence Study
      - Tips & Tricks: Inflation Layer Meshing in ANSYS

      Best of luck with your simulations,

      LEAP Support

  • Rajitha Lakmin Nakandala

    Can somone please tell me how to calculate the number of layers in the inflation tool for boundary meshing, I really need help in that

    • Please refer to our tips & tricks posts on boundary layer turbulence - there we give a comprehensive review of some best practice guidelines to consider in choosing the most appropriate turbulence model and inflation mesh for your problem

    • Hi Sajad,

      The preview tools in ANSYS meshing can be used to inspect both the surface mesh; and the modelled inflation layers. These can be used to speed up mesh checks as they don't require the full volume to be meshed. This is especially important in large models as their respective mesh can take time to generate to completion.

      You can preview the surface mesh by right clicking on the geometry and selecting "Preview Surface Mesh"

      Thanks,
      LEAP Support

  • Hello,

    I am just wondering if we can have a link to this webinar? Can it be shared or you archived it only for your clients?

    Regards,
    Behnam

Leave a Reply

Your email address will not be published. Required fields are marked *