
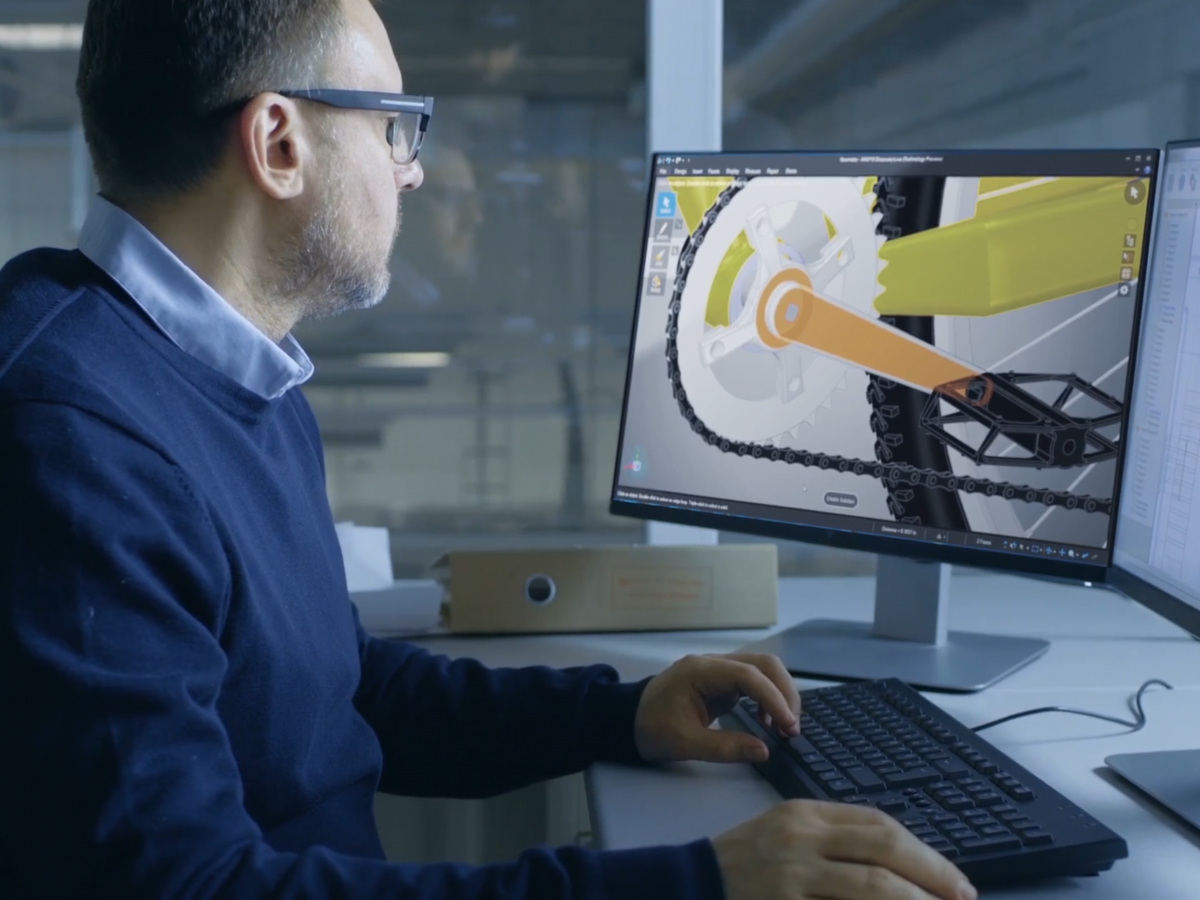
In these unprecedented times, many businesses are encouraging workers to work from home to help ‘flatten the curve’ of new cases from the global COVID-19 pandemic. Indeed, at LEAP Australia the majority of our staff are now working from home, but we are committed to providing our highest levels of customer support and high-quality software demonstrations to our valued customers throughout Australia and New Zealand using online tools.
For our customers using ANSYS products, here are some tips on the options available to you to continue running your simulations while working remotely:
Connecting to your workstation via Remote Desktop:
With Remote Desktop Connection, you can connect to a computer running Windows from another computer running Windows using the RDP client provided you can access the remote machine. When working from home, this is typically done through a VPN.
Detailed information containing the procedure for setting up a remote desktop connection can be found at the following Microsoft online help document:
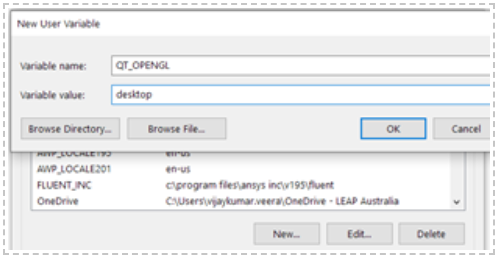
When using CFX, users may sometimes see a black screen when opening a CFX-Pre or CFD-Post session through remote desktop environment. In these instances, creating an environment variable “QT_OPENGL=desktop” can resolve the issue.
Search for “Edit the system environment variables” in the Windows start menu to launch the following panel:
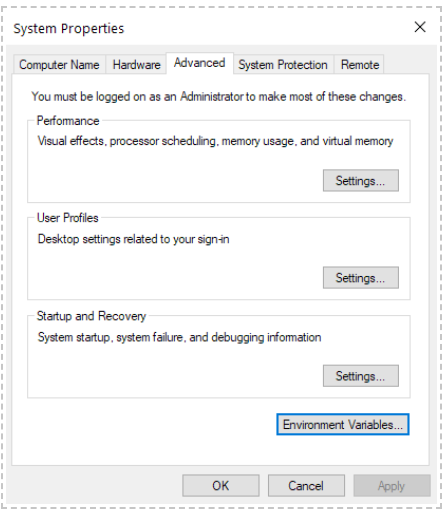
Click on Environment Variables and specify the new environment variable as shown below:
 Connecting to your company’s ANSYS license server through a VPN
For clients who can connect to their office network through a VPN, it is possible to continue running simulations on their laptop or home workstation by accessing the Ansys license server through the VPN. In most ways, once you are connected to the VPN, the experience of running ANSYS will be the same as when you’re physically in the office.
Your organization’s IT administrator can follow these steps to ensure that engineers can access the licenses through the VPN while they work from home.
- Set a static port to the ansyslmd demon; this can be done by modifying the Ansys license file’s (located at C:\Program Files\ANSYS Inc\Shared Files\Licensing\license_files by default on the license server machine) header from
SERVER <License manager hostname> <MAC Address> 1055
VENDOR ansyslmd
USE_SERVER
To
SERVER <License manager hostname> <MAC Address> 1055
VENDOR ansyslmd PORT=1056
USE_SERVER
Setting the PORT allow clients to see the status of licenses and will enable them to borrow if they are permitted. Stop and start the license manager to ensure the license server registers the change to the license file.
- Open a Windows powershell to test that the ports 1055, 1056 and 2325 are open for communication between your laptop/workstation and the Ansys license server.
Test-NetConnection -ComputerName <server hostname> -Port 1055
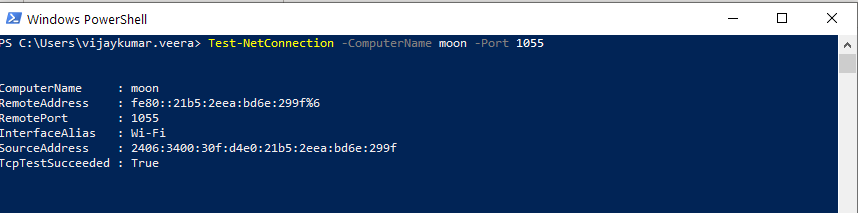
If the message TcpTestSucceeded : True is printed out for all the ports in the PowerShell, it indicates that the ports are open for communication. You will be able to check out and check in-licenses from the license server as if you were sitting in the office.
IT administrator can test this set-up by running the above commands by connecting a laptop to a mobile hotspot.
If PowerShell prints the message TcpTestSucceeded : False for any of the ports mentioned above, the IT administrator has to make those ports available via the VPN. The following command can be used to open the required ports (1055,1056 and 2325 in this instance) on the license server.
New-NetFirewallRule -DisplayName "ANSYS License Server" -Direction Inbound -Profile Domain,Private -EdgeTraversalPolicy Allow -Action Allow -Protocol TCP -LocalPort 1055,1056,2325
Borrowing ANSYS Licenses (on Windows)
License borrowing (available only on Windows machines) allows a user to take a license for use outside of the company facility, such as for an engineer to check-out a license home on his/her laptop.
License borrowing is available only on Windows machines; however, the license server machine that is managing the licenses can be any system that ANSYS, Inc. supports as a license server. Licenses can be borrowed as follows:
- Launch the client license borrowing utility: Start > ANSYS <Version> > ANSYS Client Licensing > Client ANSLIC_ADMIN Utility <Version>

2. Select Run the ANSYS Borrow Utility. On the Borrow tab, specify the version number and return date. The return date defaults to the third day from the current date. If you change any of the borrowing criteria, the product list will automatically update in five seconds.

3. Select the product(s) you want to borrow. The product list includes add-on features or geometry interfaces. If you do not see a product listed that you think should be available, verify that you have selected the correct version. Click Borrow.
4. Disconnect from the network. Note that even when you’ve disconnected from the network, you must still run the products from the same account you used to borrow the licenses. For example, if you use a network account to borrow the licenses, you cannot then run from a local account.
5. Tip: While you’re still in the office, we recommend disconnecting from the network and verifying that you can run the correct product with the borrowed licenses from your machine (remember: test this AFTER you’ve disconnected from the network, but before you leave, in case any issues need fixing). If you encounter any difficulties, you can then reconnect to the network, return the license, and then re-borrow the correct license.
The licenses can be borrowed up to a maximum of 30 days after which the licenses would be automatically returned to the license server, and you will need to redo these steps. If the user wishes to return these licenses earlier, they could use the return feature to ship these licenses back to the license server. Please follow these steps if you want to return the licenses soon:
- Reconnect to the same license server from which you borrowed the license(s).
- Launch the client license borrowing utility: Start>All Programs> ANSYS <Version>> ANSYS Client Licensing> Client ANSLIC_ADMIN Utility <Version>. Select Run the ANSYS Borrow Utility.
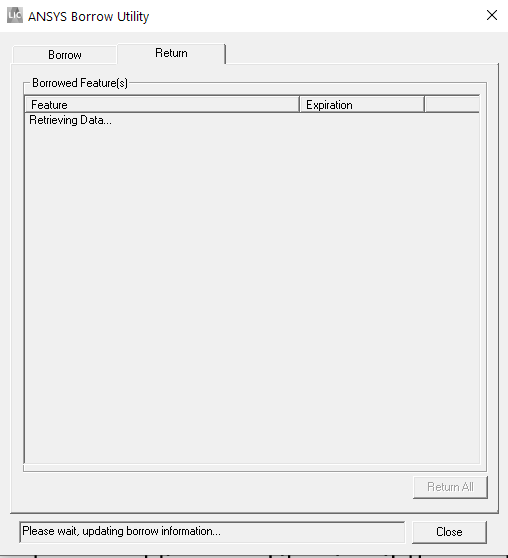
- Select the Return tab. Click Return all. If you want to keep some but not all of the licenses you borrowed, you will need to re-borrow them.
- Disconnect from the network.
The license(s) you borrowed will be returned to the pool of available licenses on your company’s server.
Note that one cannot run both borrowed and non-borrowed licenses simultaneously. For example, if you borrow licenses but remain connected to a network from which you can use licenses, you will be able to use only the borrowed licenses. Likewise, if the machine on which you borrowed licenses is also a license server from which you could typically use licenses, you would be able to use only the borrowed licenses. You can borrow only one task of any particular license.
Coming back to the office
There might be some scenarios when the user cannot access the license server after disconnecting from their company’s VPN and returning to the office. This is a known issue with some VPN tools in which the tool does not clear the IPs correctly or does not clear them immediately after the VPN disconnection. To address this issue, you need to force a DNS clear by performing the following steps:
- From a command prompt, issue the following command: ipconfig /release
- Then issue the following command: ipconfig /renew
Our team at LEAP Australia hope that we can work closely with you and your business to navigate these challenging times successfully. For help with any of the above, please reach out to LEAP technical support or your account manager for further assistance.


